Creative Billing Online Tutorials
Tips and answers to the most frequently asked questions.
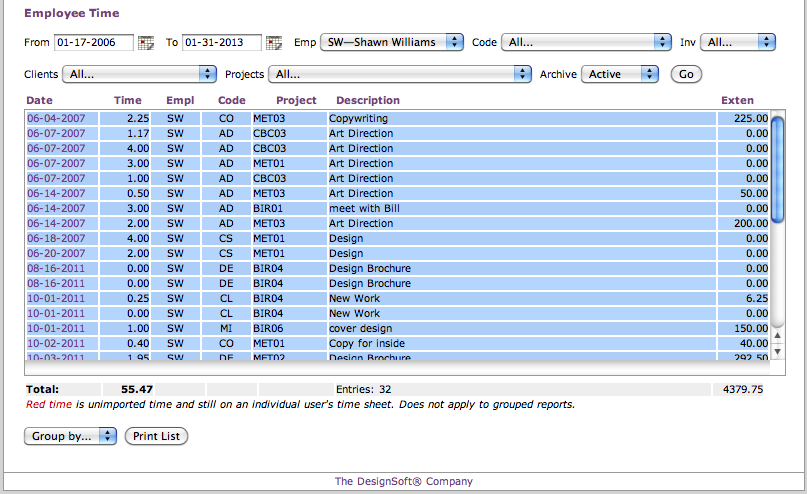
Saving and exporting Creative Billing reports to third party apps like Excel and Numbers?
It is very easy to share the data from a Creative Billing report to a third party application like a word processor or spread sheet. To do this filter a report or view a list from Creative Billing. Highlight the entry results and choose copy from your browser's menu:
Next open your third party application and use the Paste Formatted or Paste Special option:
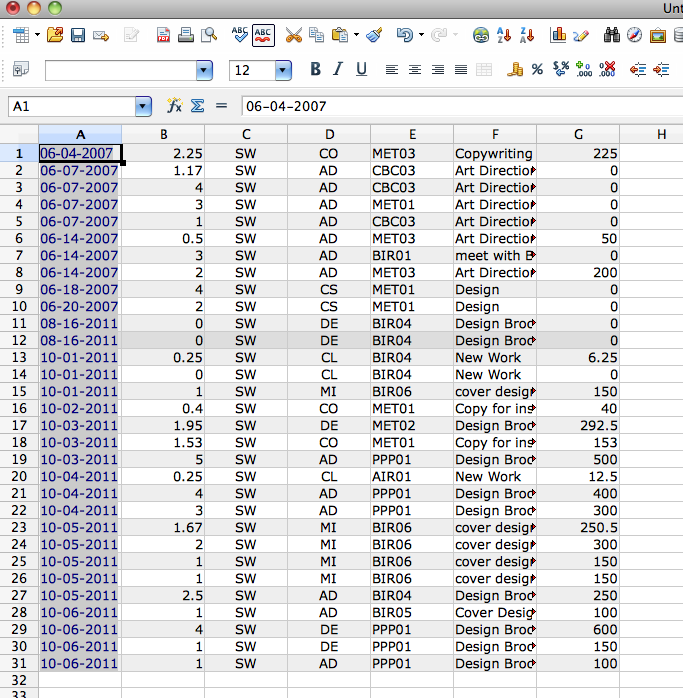
Save the data as a spread sheet file and you're done!
How do I update my credit card information for Creative Billing Online?
Log into your home page and click on the MyAccount Link on the top right:

Next click the Upgrade Button next to your plan:
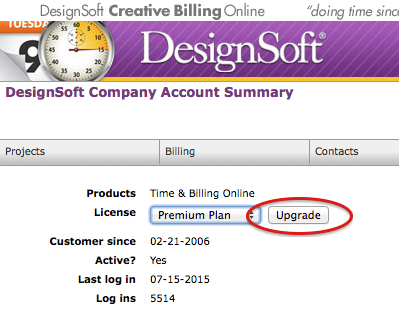
The Upgrade Button takes you to a window where you can enter your new credit card information. Enter your new credit card info and expiration date and click the Upgrade Button. A void charge will be sent to validate your card and the new card will be used for the following months.
How do I Give my employees various levels of site access?
DesignSoft Creative Billing gives you full control over your user's ability to see and/or edit any window in the software. From the most basic home page only access to administrator level access that allows the user full read and write access on any window, the user groups settings tell the system what you want the system to allow.
We strongly suggest that you do not give every user admin access and that you reserve that level for the office manager, principle or owner of the company only. If you are the account holder never ever give yourself any level of access lower than administrator! Here is an overview of how to set those levels of access for your employee users.
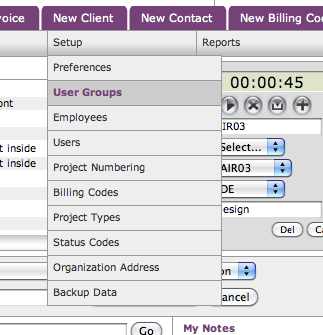
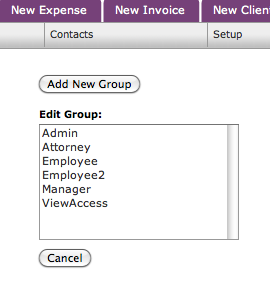
To get to the User Group settings choose Setup/User Groups:
Create a new group or edit an existing group from the User Group list:
Basic Home Page Only Access
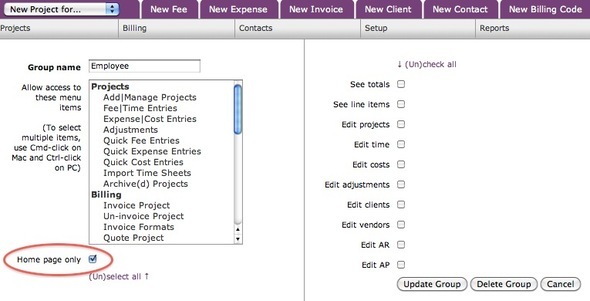
For the most limited access choose 'Home Page Only' on any new user group. This allows the user to log in and see their home page to use the timer and time sheet functions and nothing else. For regular billable employees this is the suggested level of access to the system. To set this up check the 'Home Page Only' checkbox and give your group a name. There are no other setting you need to adjust. There is a sample user group called 'Employee' that you may use that already had this level setup:
Assigning a User Group to an Employee User
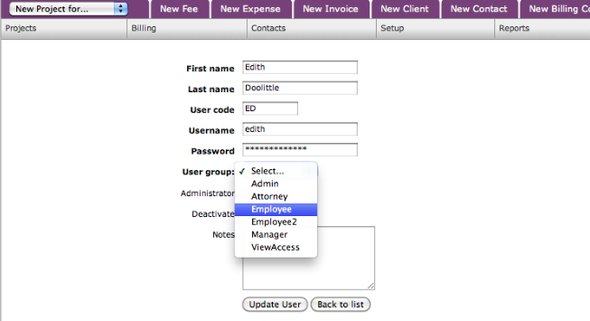
After a user group is setup you may assign it to any user. You may change that user's group to a different group at anytime later. Since we have a group with home page only access we will assign a new sample employee user to that group below so she will have basic access limited to the home page. Choose Setup/Users and click on an existing user or the New User Button. After entering her user name and password choose the user group she will belong to:
Giving a User Admin Level Access
You may give a user admin level access by checking the box in the user's setup window as shown below. This will override any user group the employee was assigned to previously or later. Unchecking the box will return the user to the user group level shown in the field:
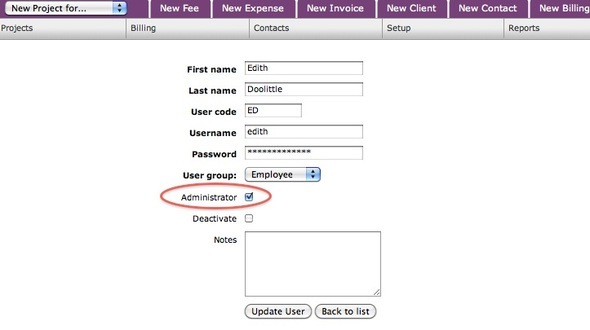
NOTE: The account holder must always have Administrator level access!
Setting Up Other Levels of Access
To give a user access to view and/or edit some windows and not others, setup a custom user group from the User Group Setup Window. The easiest way to do this is to click the 'Select All' link at each section and then un-highlight the items you do not want the user to be able to access or edit. Window and menu access settings are selected in the left hand side of the window and window edit access settings are selected on the right:
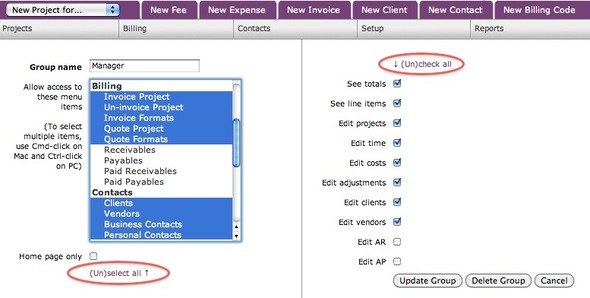
After you are finished give the group a name and assign it to any user.